Tutorial: Menu items with Product Images
NOTICE: Before reading this tutorial, you should read "Multiple Columns for the Menu Items" tutorial first
This tutorial will show you how to create menu item with a product picture (just like how it is in this DEMO)
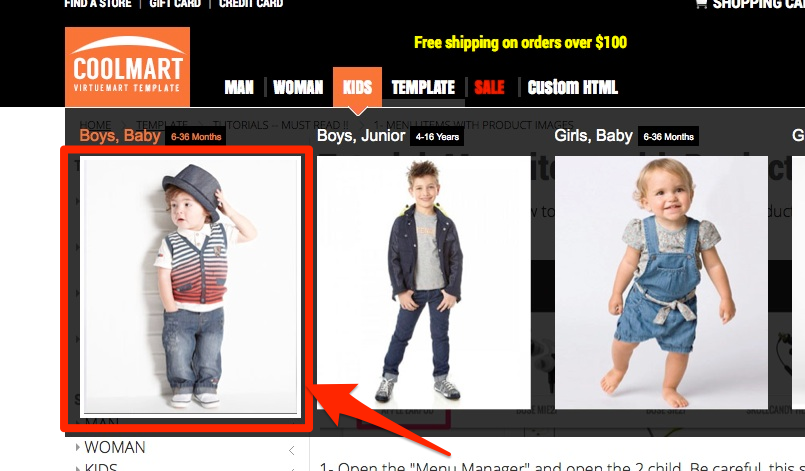
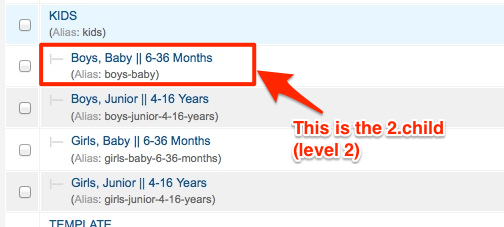
1- Open the "Menu Manager" and open the 2.child. Be careful, this should be 2. child (level 2). For instance; In this DEMO 1.CHILD is KIDS, and the 2.CHILDs are Boys-Baby, Boys-Junior, Girsl-Baby and Girls-Junior..
2- Then from the left hand side, click the "Link Type Options" TAB and then click the "Select" button from the "Link Image" section.
3- You might guess the rest. Just pick an image from there. and boom!
Make sure all the pictures you are going to pick for those menu items have exact same resolutions or same aspect ratio.
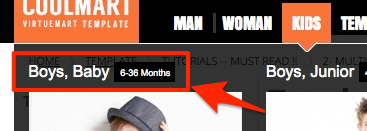
NOTE: The || seperator in the menu items make the subtitle. As you can see in the DEMO or in the screenshots, the "6-30 months" and "4-16 years" texts are subtitle and they are written after || seperator.
Usage:

Result:
That's all!


