Tutorial: Multiple Columns for the Menu Items
This tutorial will show you how to have multiple columns for the menu items (2.child).
For instance, in this DEMO:
KIDS menu item have 4 columns for 2.child items. But on the other hand; TEMPLATE menu item has 3 columns for 2.child items. You can define those columns through the menu manager.
1- Open the 1.child menu item (that you are going to add columns for its child menu items)

2- Click the "Page Display Options" Tab and type the column number as you wish.
IMPORTANT NOTICE: The level-1 menu item can't be "Text Seperator" type, otherwise "Page Display Options" would disappear.
3- To the "Page Class" field, enter one of these:
- columns-1: NO NEED TO TYPE ANYTHING, LEAVE BLANK. DEFAULT IS ALREADY columns-1
- columns-2: to make 2 columns
- columns-3: to make 3 columns
- columns-4: to make 4 columns
- ....
- ....
- ....
- columns-N: to make N columns
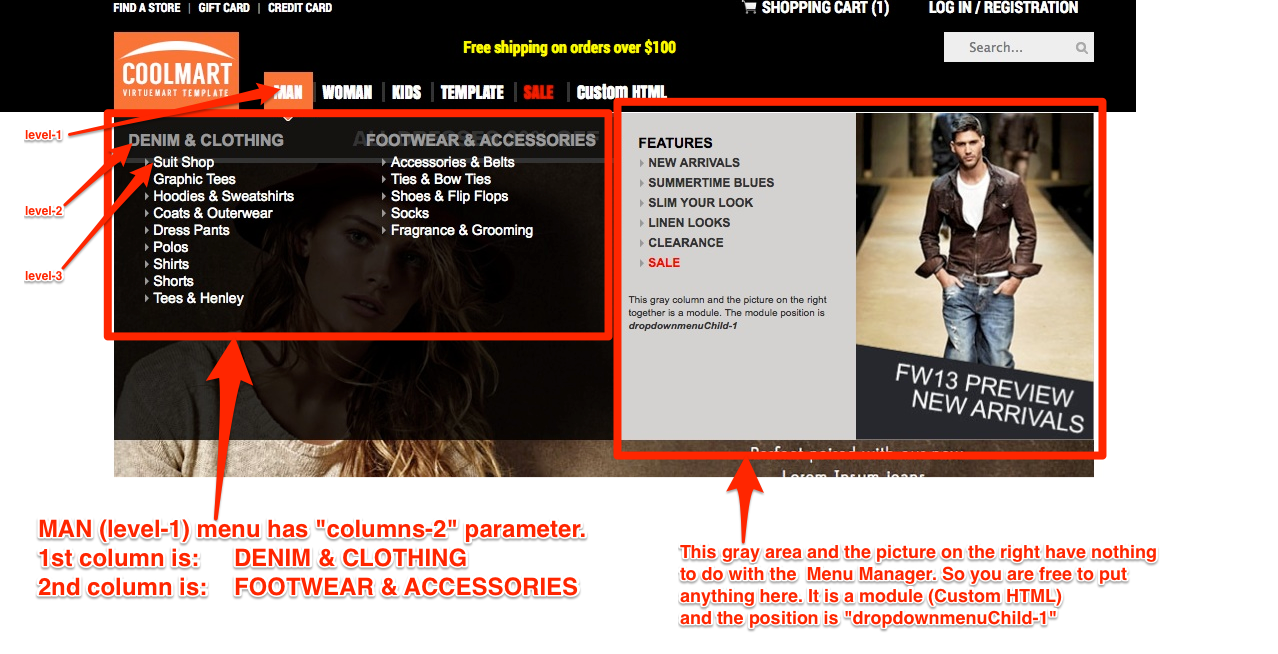
IMPORTANT: Look at this screenshot below to understand the idea to build menu items like "MAN" and "WOMAN" as you see in this DEMO: